Thursday, May 20, 2010

Oracle Applications 11i Hot Backup Cloning with Rapid Clone

We are getting lot of questions on Hot Backup Cloning of 11i in the forum. So we thought that, if we write one article regarding this, it will be more useful for the apps newbies. Here I am sharing the information that, what i follow during the hotbackup cloning. You all might have done this before.

Source System (PROD):

(a) P4 3.0 GHz System with 2GB RAM and 200 GB HDD (Redhat Linux AS 4)

/d01 ——- 40 GB (Application Tier Files)

/d02 ——- 10 GB (10g Oracle Home)

/d03 ——- 80 GB (Data Files)

/backup —- 100 GB (NFS mount point Shared on TEST Server)

Hostname: prodserver

Application Version: 11.5.10.2

Database Version: 10.2.0.2 Target System (TEST):

(b) P4 2.6 GHz system with 1.5 GB RAM with 300 GB HDD (Redhat Linux AS 4)

/d01 ——- 40 GB (Application Tier Files)

/d02 ——- 10 GB (10g Oracle Home)

/d03 ——- 80 GB (Data Files)

/backup —- 100GB (NFS Share Directory)

Hostname: testserver

Application Version: 11.5.10.2

Database Version: 10.2.0.2

Note: This target System was previously cloned with cold backup. This is second time cloning with Hot Backup from PRODSERVER.

Stage1: Prerequisites:

 ========> Apply OUI22 Patch, 5035661 to every IAS Oracle Home
          and RDBMS Oracle Home to be cloned. 
          If you are having 10g Oracle Home,
          there is no need of applying this patch. 
          You need to apply this patch on IAS Oracle Home 
         (if Database is not 10g)

A. Applying the patch on the iAS $ORACLE_HOME:

   ====================================================
   (a)  Unzip the patch into the  directory:
       $unzip -od /d01/prodora/iAS p5035661_11i_LINUX.zip
   (b)   Source the Apps environment file :
         $. $APPL_TOP/APPSORA.env
   (c)   Change directory to the /appsoui/setup
        $cd $IAS_ORACLE_HOME/appsoui/setup
   (d)  Execute the perl script OUIsetup.pl:
       $perl OUIsetup.pl
  NOTE:
  In the case of a Multi-Node instance, the above process
  should be repeated on the  of each Node.
(B) Applying the patch on the RDBMS $ORACLE_HOME: 
     (This step is not required for my current setup, 
    because my database version is 10g R2)
  (a)  Unzip the patch into the  directory:
       $unzip -od /u01/proddb/9.2.0 p5035661_11i_LINUX.zip
  (b)  Source the DB environment file :
       $. $ORACLE_HOME/PROD_prodserver.env
  (c) Change directory to the /appsoui/setup
      $cd $ORACLE_HOME/appsoui/setup
  (d) Execute the perl script OUIsetup.pl:
      $perl OUIsetup.pl
======> Check all other Requirements as Perl, JRE, JDK, ZIP utilities on Source and Target Nodes as per
        document “Cloning Oracle Applications Release 11i with Rapid Clone”
=======> Apply the Latest AD Minipack on Application Tier (Latest One is AD.I.5)
=======รจ Apply the Latest Autoconfig Template Patch and Latest Rapidclone Patches to Application Tier (Check Metalink for These Patches)
Stage2: Prepare the Source System (PRODSERVER)
      (a) Login into Database Tier as ORACLE user and run the preclone
           $cd $ORACLE_HOME/appsutil/scripts/PROD_prodserver
           $perl adpreclone.pl dbTier
      (b) Login into the Application Tier as APPLMGR User and run the  preclone
           $cd $COMMON_TOP/admin/scripts/PROD_prodserver
           $perl adpreclone.pl appsTier
Stage3: Put the Database in Begin Backup Mode and copy the Database Files 
       (a)   Login into database as sysdba user
             $sqlplus “/as sysdba”
             Sql> alter database begin backup;
       (b)   Copy Archive log files created during hot backup to /backup directory.
       (c)   Copy the All Data files to /backup directory.
       (d)   Backup the control file to trace.
             Sql> alter database backup control file to trace;
             Copy this trace file to /backup directory
       (e)   Copy the current init.ora file to /backup directory
       (f)   End the Begin Backup Mode.
             Sql> alter database end backup.
 Stage4: Copy the Application Tier File System Files
         (a)Login into the Application Tier as APPLMGR user and copy the APPL_TOP, COMMON_TOP, 
             IAS ORACLE HOME and 8.0.6 Oracle Home to /backup directory
 Stage5: Copy the Source Database files and Application Files to Target server
     Copy the parameter file, backup control file and archive log files from /backup directory  
          to /d01, /d02 and /d03 in target server.
 Stage 6: Configure the Target Database (TESTSERVER)

Log on to the target system as the ORACLE user

(1) Configure the

cd /appsutil/clone/bin

perl adcfgclone.pl dbTechStack

(2) Create the target database control file manually

Open the backed up control file

a. remove all lines before the startup nomount statement

b. Modify the REUSE to SET

c. Modify Source DB SID to Target SID (Here PROD to TEST)

d. Modify NORESETLOGS TO RESETLOGS

e. delete all lines after the CHARACTER SET statement

————————————

CREATE CONTROLFILE SET DATABASE “TEST” NORESETLOGS ARCHIVELOG…

LOGFILEGROUP 1

‘/d03/log01.log’ SIZE 50M,

DATAFILE

‘/d03/system01.dbf’,

‘/d03/undotbs01.dbf’,

CHARACTER SET UTF8;

—————————————————–

On the target system, modify the init.ora to have the target SID and location of the control file and also make sure that init.ora parameters are set for archive log mode On the target system,

starup the database in nomount stage

sql> startup nomount pfile=<>

sql> @clone.ctl ( here clone.ctl is the control file which we have modified above)

Once control file is created, database will be in mount stage

execute recover command using backup control file after the database is mounted

SQL> RECOVER DATABASE USING BACKUP CONTROLFILE UNTIL CANCEL;

After the last archive log has been applied, issue the following command

SQL> alter database open resetlogs;

After opening the database, add temp files to target database

(3) Run the library update script against the database

cd /appsutil/install/

Where is “sl” for HP-UX, “so” for any other UNIX platform and not required for Windows.

(4)Configure the target database (the database must be open)

cd /appsutil/clone/bin

perl adcfgclone.pl dbconfig

where target context file is: /appsutil/.xml

Stage 7 : Configure the Target Application Tier

Logon to the target system as the APPLMGR user and type the following commands

$Cd $COMMON_TOP/clone/bin

$Perl adcfgclone.pl appsTier

Finishing tasks:

(1) Update Profile options

(2) Update Printer Settings

(3) Update the workflow configuration settings

(4) Verify the APPLCSF variable setting

(5) Update the session_cookie_domain value in icx_parameters

For the finishing tasks, check the finishing tasks section of the following document

Cloning Oracle Applications Release 11i with rapid clone Note: 230672.1

Rapid Clone for Single Node - Linux

The Basic Steps for Cloning

After installing the Rapid Clone and AutoConfig patches, you are ready to clone an instance. There are ten basic steps involved. I have outlined them below:

1. Run system configuration on the Application tier:
/admin/scripts//adautocfg.sh
Use the APPS password when prompted.

2. Run system configuration on the database tier:
/appsutil//scripts/adautocfg.sh
Use the APPS password when prompted.

3. Copy AutoConfig to the RDBMS ORACLE_HOME:
Apply patch 2952369 to acquire adchkcfg utility.
Create appsutil.zip file by: perl /bin/admkappsutil.pl.
Copy appsutil.zip file to the
unzip -o appsutil.zip

4. Generate the database context file:
cd /appsutil/bin
adbldxml.sh tier=database appsuser= appspasswd=
Output log is written to: $ORACLE_HOME/appsuti/out//cfgcheck.txt

5. Generate and apply AutoConfig configuration file:
cd /appsutil/bin
adconfig.sh contextfile= appspass=

6. Prepare for source database clone:
cd /appsutil/scrips/
./perl adpreclone.pl dbTier

7. Prepare for source application clone:
cd /admin/scripts/
./perl adpreclone.pl appsTier

8. Copy the application tier file system:
Logon to the source system as APPLMGR and shut down the server processes.
Copy the following application directories from the source to the target node/file system:

APPL-TOP
OA_HTML
OA_JAVA
COMMON_TOP/util
COMMON_TOP/clone
806 ORACLE_HOME
iAS ORACLE_HOME

Shut down the source database and copy it to the target node/file system.
Restart the source database and source application server processes.

9. Configure the target system database sever:
cd /appsutil/clon/bin
./perl adcfgclone.pl dbTier

10. Configure the target system application tier:
cd /clone/bin
./perl adcfgclone.pl appsTier

Note: These steps are for a single node install. If you are using Oracle Workflow, you must update wf_notification_attributes and wf_item_attribute_values.

Version 2.1.0.17 of the Oracle Universal Installer and Perl 5.005 should be installed and included in your path. Be sure to review your install logs after cloning to make sure there are no errors. After you have verified connectivity in the cloned environment, have a user navigate through the system to verify the clone is functional and complete.

Rapid Cloning Steps for Oracle EBS R12 (R12.0.6) Windows

Rapid Cloning Steps for Windows R12

Source System:
1.Run adpreclone.pl in Database Node
2.Perl $ORACLE_HOME\appsutil\scripts\$CONTEX_NAME\adpreclone.pl dbTier
3.Run adpreclone.pl in Apps Node
4.Perl $ADMIN_SCRIPTS_HOME\adpreclone.pl appsTier
5.Shut down the Applications and database
6.Change all services type into manual (option)
7.Restart the system (option)
8.Check if any FNDLIBR programs are running or not
9.Take a cold backup of database and applications

Target System:
Prepare your target system as per the source system configuration
1.Install Windows Server 2003 service pack 2 Ent Edition(Target system is windows server 2003)
2.Install Visual Studio 2005
3.Install Active perl
4.Install Cygwin Change make version from 3.81 into 3.80
5.Copy the Source system backup into target system
6.Set perl locations by using existing env file(It varies DB node and Apps Node, We will set this two times)
7.Goto the $ORACLE_HOME\appsutil\clone\bin folder and the post clone scripts
8.Run Postclone scripts in db Tier
9.Perl $ORACLE_HOME\appsutil\clone\Bin\adcfgclone.pl dbTier
10.Run Postclone in Apps Tier
11.Perl $COMMON_TOP\clone\bin\adcfgclone.pl appsTier

Finishing Tasks:
1.Update the profile options
Rapid clone will update the site level profile options only, we need to update instance level profile options manually
2.Update the printer settings
3.Update the workflow configuration settings
Cloning an Oracle Applications instance will not update the host and instance specific information used by Oracle Workflow. Review the following tables and columns to verify there is no instance specific data in the Workflow configuration on the target system.

Important Notes:
a).While running Postclone in appsTier it prompts hostname, we should give like hostname.domainname for example sys10.sample.com
b).While running post clone in appsTier it prompts visual studio directory don\u2019t include bin folder. For example give like c:\vc\VC, don\u2019t give like c:\vc\VC\bin

Oracle Applications HOWTO: change apps password

Steps to change apps password

1. Backup entire system

2. Stop concurrent manager

  cd $COMMON_TOP/admin/scripts/$CONTEXT_NAME
adcmctl.sh stop apps/

3. Backup FND_ORACLE_USERID table

  sqlplus apps/
drop table FND_ORACLE_USERID_BAK;
create table FND_ORACLE_USERID_BAK as select * from FND_ORACLE_USERID;
exit;

4. Change apps password

  $FND_TOP/bin/FNDCPASS apps/ 0 Y system/ SYSTEM APPLSYS 

5. Change apps password in configuration files

  $IAS_ORACLE_HOME/Apache/modplsql/cfg/wdbsvr.app
$IAS_ORACLE_HOME/listener/cfg/wdbsvr.app
$ORACLE_HOME/listener/cfg/wdbsvr.app
$FND_TOP/resource/wfmail.cfg
$OA_HTML/bin/appsweb.cfg
$AD_TOP/admin/template/CGIcmd.dat

Known Issues

1. Symptom : Can not login to Oracle Applications

  Cause   : Invalid apps password in $IAS_HOME/Apache/modplsql/cfg/wdbsvr.app
Solution: Change apps password in $IAS_HOME/Apache/modplsql/cfg/wdbsvr.app

Monday, May 10, 2010

Opatch Syntax

OPatch is the Oracle database's Interim (one-off) Patch Installer.

If OPatch is not installed into your Oracle Home ($ORACLE_HOME/OPatch), you may need to download it from Metalink and install it yourself.

Syntax

Syntax and options can be displayed using the -help option:

$ cd $ORACLE_HOME/OPatch
$ opatch -help
Invoking OPatch 10.2.0.4.2

Oracle Interim Patch Installer version 10.2.0.4.2
Copyright (c) 2007, Oracle Corporation. All rights reserved.


Usage: opatch [ -help ] [ -r[eport] ] [ command ]

command := apply
lsinventory
napply
nrollback
rollback
query
version
prereq
util

:= -help Displays the help message for the command.
-report Print the actions without executing.

example:
'opatch -help'
'opatch apply -help'
'opatch lsinventory -help'
'opatch napply -help'
'opatch nrollback -help'
'opatch rollback -help'
'opatch prereq -help'
'opatch util -help'

OPatch succeeded.

Listing installed patches

All patches that are installed with Oracle's OPatch Utility can be listed by invoking the opatch command with the lsinventory option. Here is an example:

$ cd $ORACLE_HOME/OPatch

$ opatch lsinventory
Invoking OPatch 10.2.0.1.0

Oracle interim Patch Installer version 10.2.0.1.0
Copyright (c) 2005, Oracle Corporation. All rights reserved..
...
Installed Top-level Products (1):

Oracle Database 10g 10.2.0.1.0
There are 1 products installed in this Oracle Home.

There are no Interim patches installed in this Oracle Home.

OPatch succeeded.

Tips for using the OPatch Utility


The best tutorial for Opatch
=====================
http://download.oracle.com/docs/cd/B28359_01/em.111/b31207/oui7_opatch.htm


Brandeis University has published a nice overview on using the Oracle OPatch utility to apply patches to Oracle databases:
This page contains syntax example for using the OPatch command line utility to apply patches, apply interim patches and viewing a list of patches. It shows the OPatch command invocation:

Or use the wrapper script (unix only) which may be invoked after setting the correct $ORACLE_HOME environment variable

opatch command [options>] [-h[elp]]


where command is one of:

apply

lsinventory

rollback

version

It also lists the patch log file directory:

$ORACLE_HOME/.patch_storage/patch_logfile

How to apply Opatch in Oracle

We will begin the discussion by knowing what exactly is Opatch?

- OPatch is a java based utility that allow the application and rolling back of interim patches to an Oracle product. The program has sub-commands that may take arguments. The program requires Java(JVM) to be present on the current system.OPatch expects users to have commands such as fuser, jar, ar and make on Unix platforms and jar on Windows platforms to be available in their PATH.

Opatch Details

How to check the Opatch version?

-bash-3.00$ ./opatch version
Invoking OPatch 10.2.0.3.0

OPatch Version: 10.2.0.3.0

OPatch succeeded.

How to know which version is the correct version of Opatch for your RDBMS home?

You can verify whether the Opatch version for your RDBMS release is correct or not using metalink note ID 357221.1.

This note ID gives the copatibilities between OPatch version and RDBMS version.

How to get the latest version of OPatch?

You can download the latest version of OPatch from metalink using following URL.

http://updates.oracle.com/download/6880880.html

In the release dropdown you can select the OPatch release that you want to download based on your RDBMS version. Please read the README.txt before applying the patch.

What is Oracle Database Inventory and where it is located?

Oracle Inventory is the location or the place where all the information about an Oracle Home is stored and maintained. When ever we install an RDBMS Oracle Home, a new inventory gets created. Applying any new patch to Oracle Home will update the invnrtory for that Oracle Home and record the details for the patch applied. This inventory is in the form of XML files.

The location of inventory is defined in a file called oraInst.loc. The path for this file is provided while installing Oracle Home. If we dont supply any path, the is file will be present at central location /etc/oraInst.loc. Also we can have a central inventory if its not used by any other oracle installation. If the central inventory is used by previous Oracle installation we can create local inventory. The content of oraInst.loc file is as shown below.

-bash-3.00$ cd $ORACLE_HOME
-bash-3.00$ cat oraInst.loc
inventory_loc=/slot/ems2029/appmgr/apps/tech_st/10.1.2/oraInventory
inst_group=ems2029
-bash-3.00$

Here “inventory_loc” gives the location of Inventory directory where as inst_group gives the name of the group which is the owner of this inventory.

How to create Local Inventory?

You can create local inventory at any location while installing Oracle Home. You need to use -invPtrLoc variable along with runInstaller command and give the location of oraInst.loc. Otherwise the default path assumed for oraInst.loc is /etc/oraInst.loc.

./runInstaller -invPtrLoc /slot/ems2029/appmgr/apps/tech_st/10.1.2/oraInst.loc

After the installation starts it will ask for location of oraInventory directory and group which should own it. It will make entry of these into oraInst.loc file.

Having know the above information about opatch, now we will move to details about using opatch and various options available.

Opatch help

You can get all the options using opatch -help

-bash-3.00$ ./opatch -help
Invoking OPatch 11.1.0.6.0

Oracle Interim Patch Installer version 11.1.0.6.0
Copyright (c) 2007, Oracle Corporation. All rights reserved.

Usage: opatch [ -help ] [ -r[eport] ] [ command ]

command := apply
lsinventory
prereq
query
rollback
util
version

:= -help Displays the help message for the command.
-report Print the actions without executing.

example:
‘opatch -help’
‘opatch apply -help’
‘opatch lsinventory -help’
‘opatch prereq -help’
‘opatch rollback -help’
‘opatch util -help’

OPatch succeeded.

You can get specific help for any command of opatch using opatch -help. Example opatch apply -help.

Applying single patch using opatch

1. You MUST read the Readme.txt file included in opatch file, look for any prereq. steps/ post installation steps or and DB related changes. Also, make sure that you have the correct opatch version required by this patch.
2.Make sure you have a good backup of database.
3. Make a note of all Invalid objects in the database prior to the patch.
4. Shutdown All the Oracle Processes running from that Oracle Home , including the Listener and Database instance, Management agent etc.
5. You MUST Backup your oracle Home and Inventory

tar cvf – $ORACLE_HOME $ORACLE_HOME/oraInventory | gzip > Backup_Software_Version.tar.gz

6. Unzip the patch in $ORACLE_HOME/patches

If you are applying a single intrim patch to oracle home, then change the location to the directory of that patch and then invoke following command.

Example if I need to apply patch 6972343 to RDBMS Oracle Home

-bash-3.00$ cd 6972343
-bash-3.00$ pwd
/slot/ems2029/oracle/db/tech_st/11.1.0/patches/6972343
-bash-3.00$ ls
etc files README.txt
$ORACLE_HOME/OPatch/opatch apply

If you have created local inventory then you need to give the correct path for local inventory stored in oraInst.loc. If you have updated /etc/oraInst.loc with correct location of your inventory, then above command will work, If not you can give the correct location by giving local oraInst.loc file.

$ORACLE_HOME/OPatch/opatch apply -invPtrLoc /slot/ems2029/oracle/db/tech_st/11.1.0/oraInst.loc

Remember that when we are applying patch, patch number is NOT provided as an input to opatch command. So we have to to be in the directory of patch since opatch will pick the patch files from current directory.

Rolling back a patch

In case if a patch did not fix the issue or if you has applied wrong patch to oracle home, you can always rollback the patch using following comamnd.

opatch rollback -id

Applying bundle patches

Some times if you have to apply bundle patch having many patches, example lets say you want to a bundle patch 6778860 ( 11.1.0.6 BUNDLED PATCH FOR EBS 11I)) containing many other patches to RDBMS home, OPatch provides a facility to apply many patches to RDBMS home using a single comamnd. Following command should be used for applying bundle patches.

Download the patch and extract the same. You will see many directories (one for each patch) inside the main patch directory. Execute following command to apply all patches.

$ORACLE_HOME/OPatch/opatch util NApply -invPtrLoc /slot/ems2029/oracle/db/tech_st/11.1.0/oraInst.loc

NApply -> Will apply all patches to RDBMS home.

You can also use -phBaseDir to point to the directory where bundle patch is installed. So you can run opatch command from any location

$ORACLE_HOME/OPatch/opatch util NApply -phBaseDir /slot/ems2029/oracle/db/tech_st/11.1.0/patches/6778860 -invPtrLoc /slot/ems2029/oracle/db/tech_st/11.1.0/oraInst.loc

You can also apply specific patches using NApply

opatch util napply -id 1,2,3 -skip_subset -skip_duplicate

This will apply patches 1, 2, and 3 which are under <> directory. OPatch will skip duplicate patches and subset patches (patches under that are subsets of patches installed in the ORACLE_HOME)

You can see all the options for NApply using following help command.

$ORACLE_HOME/OPatch/opatch util NApply -help

Query the inventory for patches applied

We can query the inventory to check various components installed for database as well as to check various patches applied to database. Use following command to get a minimum information from inventory about patches applied and components installed.

$ORACLE_HOME/OPatch/opatch lsinventory -invPtrLoc /slot/ems2029/oracle/db/tech_st/11.1.0/oraInst.loc

Patch 5763576 : applied on Wed May 28 03:20:53 PDT 2008
Created on 6 Feb 2008, 02:26:04 hrs PST8PDT
Bugs fixed:
5763576

If you are using central inventory then -invPtrLoc variable is not required.

You can also get the detailed view of inventory using following command. In case of detail information it gives which are the files that this patch have touched.

$ORACLE_HOME/OPatch/opatch lsinventory -detail -invPtrLoc /slot/ems2029/oracle/db/tech_st/11.1.0/oraInst.loc

Patch 6318357 : applied on Wed May 28 03:33:27 PDT 2008
Created on 4 Dec 2007, 22:02:16 hrs PST8PDT
Bugs fixed:
6318357
Files Touched:
udjvmrm.sql –> ORACLE_HOME/javavm/install/udjvmrm.sql
Patch Location in Inventory:
/slot/ems2029/oracle/db/tech_st/11.1.0/inventory/oneoffs/6318357
Patch Location in Storage area:
/slot/ems2029/oracle/db/tech_st/11.1.0/.patch_storage/6318357_Dec_4_2007_22_02_16

Which options are installed in Oracle Home?

You can check the options installed in RDBMS home using above command. The options installed will be listed at the start of output.
Example: $ORACLE_HOME/OPatch/opatch lsinventory -detail -invPtrLoc /slot/ems2029/oracle/db/tech_st/11.1.0/oraInst.loc

The complete output of this command can be seen at this location.

Opatch Log files

Log file for Opatch utility can be found at $ORACLE_HOME/cfgtoollogs/opatch

Advanced Option for OPatch

Here are some of the advanced options of OPatch utility.

UpdateRemoteNodes

It is used to propagate/remove files/directories to/from remote nodes using files under ORACLE_HOME/.patch_storage//rac/*.

The directories listed in copy_dirs.txt will be copied to remote nodes.
The files listed in copy_files.txt wil be copied to remote nodes.
The directories listed in remove_dirs.txt will be deleted from remote nodes.
The files listed in remove_files.txt will be deleted from remote nodes.
This is used where RAC setup is present.

Cleanup

It is used to clean up ‘restore.sh, make.txt’ files and ‘rac, scratch, backup’ directories in the ORACLE_HOME/.patch_storage directory. If -ps option is used, then it cleans the above specified areas only for that patch, else for all patches under ORACLE_HOME/.patch_storage. You will be still able to rollback patches after this cleanup.
Example: opatch util cleanup -ps 6121183_Ju _21_2007_04_19_42

CopyListedFiles

It is used to copy all files listed in ORACLE_HOME/.patch_storage//rac/copy_files.txt to remote nodes. If -fp option is used, then one can specify the path of the file containing the list of files to be copied. The files mentioned in this file will be copied to the remote nodes.
Example: opatch util copylistedfiles -fp a -remote_nodes ceintcb-a5
This is used where RAC setup is present.

CopyListedFilesTest

It is used to copy a single file to remote nodes. The usage remains the same as CopyListedFiles.
Example: opatch util copylistedfilestest -fp /home/oracle/a -remote_nodes ceintcb-a5
This is used where RAC setup is present.

CopyListedDirs

It is used to recursively copy all directories listed in ORACLE_HOME/.patch_storage//rac/copy_dirs.txt to remote nodes. If -dp option is used, then one can specify the path of the file containing the list of directories to be copied. The directories mentioned in this file will be copied to the remote nodes.
This is used where RAC setup is present.

CopyListedDirsTest

It is used to copy a single file to remote nodes. The usage remains the same as CopyListedDirs.
This is used where RAC setup is present.

RemoveListedFiles

It is used to remove files listed in ORACLE_HOME/.patch_storage//rac/remove_files.txt on remote nodes. If -fr option is used, then one can specify the path of the file containing the list of files to be removed. The files mentioned in this file will be removed from the remote nodes.
This is used where RAC setup is present.

RemoveListedFilesTest

It is used to remove a single file from remote nodes. The usage remains the same as RemoveListedFiles.
This is used where RAC setup is present.

RemoveListedDirs

It is used to recursively remove directories listed in ORACLE_HOME/.patch_storage//rac/remove_dirs.txt from remote nodes. If -dr option is used, then one can specify the path of the file containing the list of directories to be removed. The directories mentioned in this file will be removed from the remote nodes.
This is used where RAC setup is present.

RemoveListedDirsTest

It is used to remove a single directory from remote nodes. The usage remains the same as RemoveListedDirs.
This is used where RAC setup is present.

RunLocalMake

It is used to invoke re-link on the local node. The make commands are stored in ORACLE_HOME/.patch_storage//make.txt. You need to use the -ps option to specify the Patch ID with timestamp. A directory by this name will be present under ORACLE_HOME/.patch_storage. The make.txt file present under ORACLE_HOME/.patch_storage// will be used to perform the local make operation. This command cannot be run if you have already run Cleanup as it would have removed these make.txt files.

Example: opatch util runlocalmake -ps 6121250_ un_21_2007_04_16_11

RunRemoteMake

It is used to invoke re-link on remote nodes. The make commands are stored in
ORACLE_HOME/.patch_storage//rac/makes_cmd.txt. The usage remains the same as RunLocalMake.
This is used where RAC setup is present.

RunAnyCommand

It is used to run any command on remote nodes. The command should be specified using the -cmd option.
Example: opatch util runanycommand -remote_nodes ceintcb-a5 -cmd ls
This is used where RAC setup is present.

LoadXML

It is used to check the validity of an XML file. The -xmlInput option can be used to specify the path of the xml file.

@ Support can use this utility to verify the integrity of XML files contained in the local and central inventory.
Example: opatch util loadxml -xmlInput $ORACLE_HOME/inventory/ContentsXML/comps.xml

Verify

It is used to run the patch verification process to ensure that the patch was applied to the ORACLE_HOME. It uses the defined ORACLE_HOME and the given patch location via -ph, to run the check.

@ Support can use this utility to re-run the OPatch verification stage, if required for patch diagnosis. The patch staging area has to be present or created.

Example: opatch util verify -ph ~/6646853/6121183

Troubleshooting

Some times the inventory get corrupted because of some issues. In that case you need to repair the inventory. Following are the two methods which I know can be used to repair the inventory.

1) Development has released a utility (checkinv) which can be use to repair the inventory if it becomes corrupted for some reason.

Please note that this version of checkinv works only for 9.2 and 10.1 releases of oracle database. This doesn’t work for 10.2 releases of oracle database.

You can download the checkinv utility from Patch 4121946.

To cleanup the components, you should determine the unwanted or dangling components, then specify those using the option “-remcomp”, to cleanup the component list.

The utility detects and asks user’s permission to repair a bad inventory. In case you want to repair the inventory, the utility will first back up the files before any modification.

However, it is better that you backup the inventory before running the tool.

For more details, check metalink note ID 298906.1

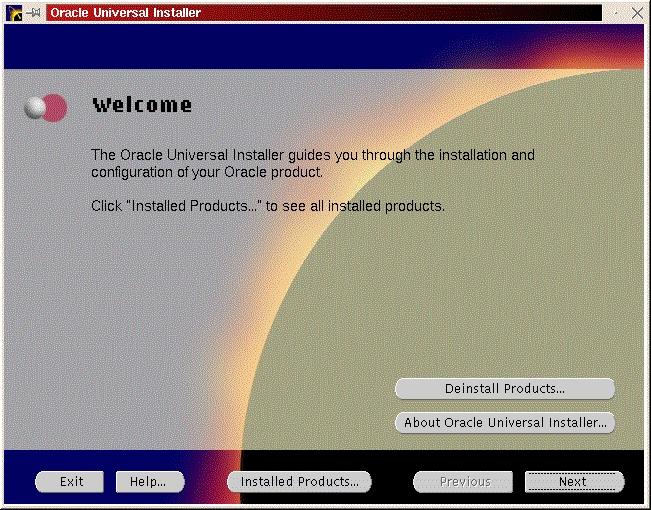
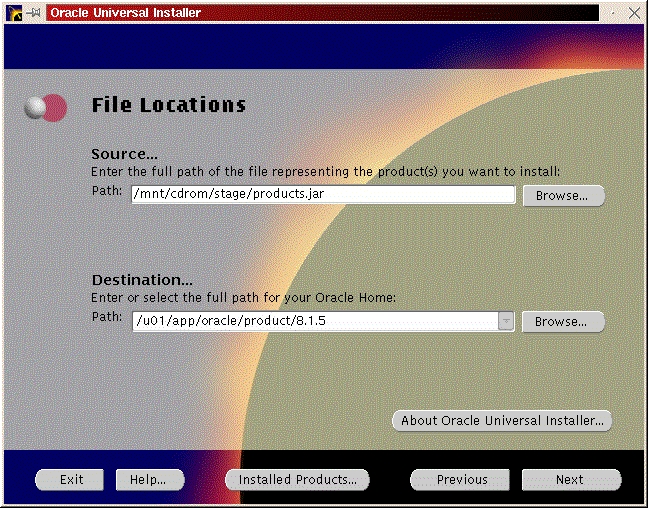
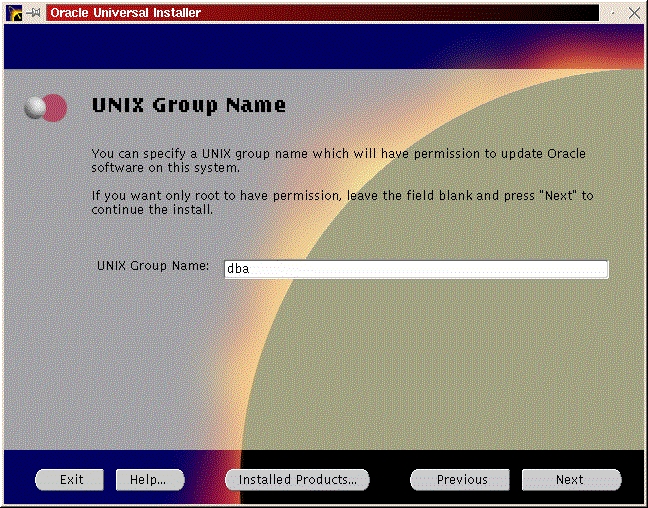
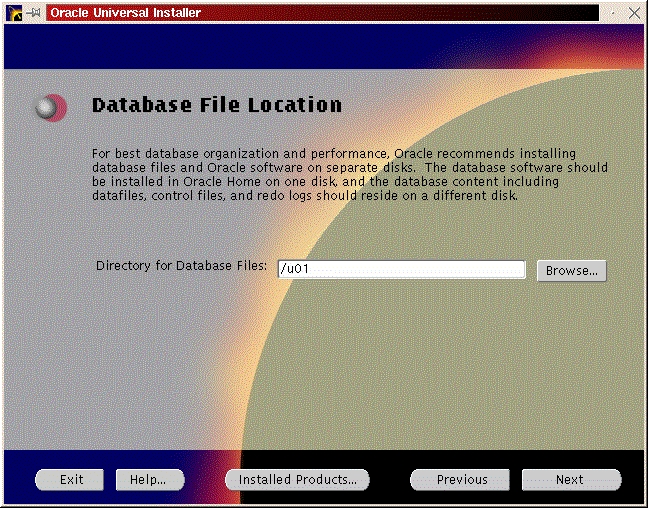
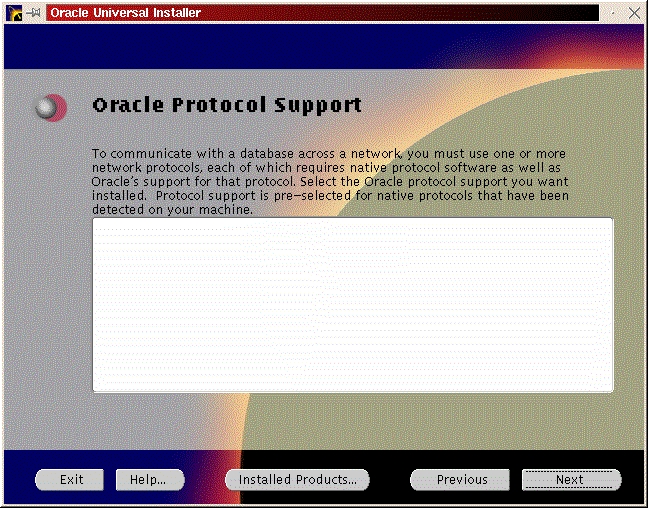
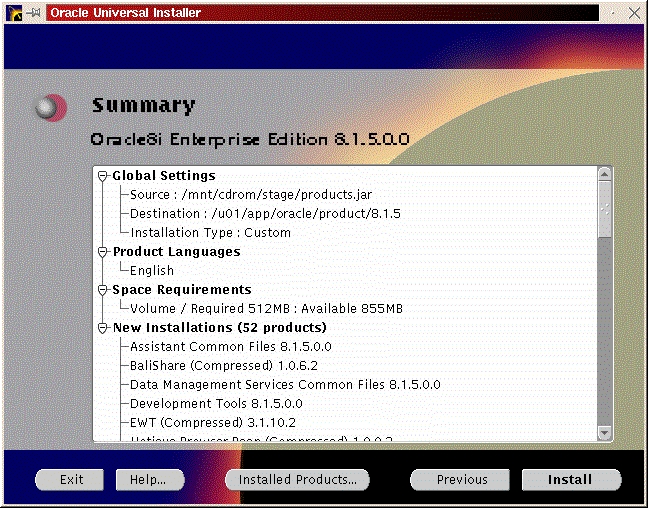
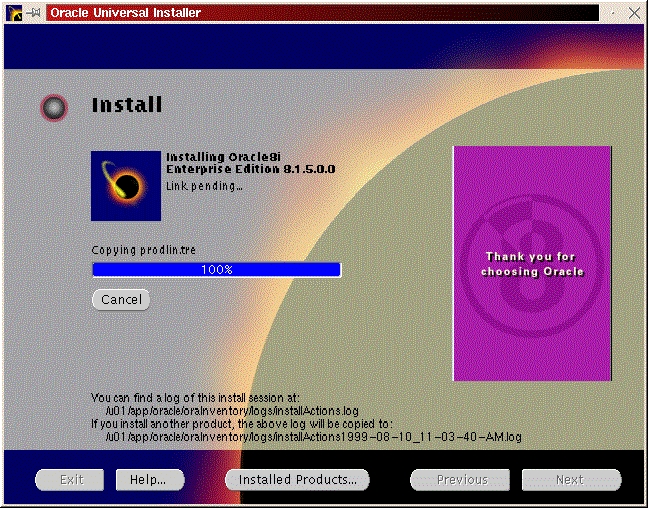
2) Creating a new inventory using Oracle Universal Installer (OUI).

Check my older post http://advait.wordpress.com/2008/03/21/creating-oracle-home-inventory-oracle-database-10g/ for the same.

Hope this helps !!

References:

Metalink note ID : 298906.1
Metalink note ID : 554417.1
Metalink note ID : 374092.1
Metalink note ID : 357221.1

======================================================

OPatch Apply In database Level

OPatch is a Database patch.

Please download latest OPatch Tool and extract the RDBMS Oracle home.


1. Check the OPatch already installed or not

cd $ORACLE_HOME/OPatch

$opatch -lsinventory

This is command will show existing patch

Then Export the following environmet file

$ export ORACLE_HOME=/UAT/app/oracle
$ export PATH=$PATH:$ORACLE_HOME/OPatch:$ORACLE_HOME/bin
$ export OBJECT_MODE=32_64


$ cd patch/

Extract the Following OPatch.
p5246372_10203_LINUX.zip
p5965763_10203_LINUX.zip

5246372
5965763

Then Go to patch Directory and apply the Opatch.
$ cd 5965763/


$ opatch apply

Reference:
OPatch documentation list

======================================================

Applying one-off interim patch of Oracle using OPATCH utility:

Hi friends,

Today we are discussing about Oracle upgrade for applying interim or one-off patch. Interim patch or one-off patch is applied by Opatch utility.

Opatch utility is provided by Oracle itself. If Opatch utility doesn’t install or doesn’t find out in your ORACLE_HOME then you should require to download from Oracle Support site.

Oracle’s oneoff patch or interim patch is installed by Opatch only. For check weather opatch utility has been installed or not check following commands.

$ cd $ORACLE_HOME/OPatch
$ opatch -help
Invoking OPatch 10.2.0.4.2

Oracle Interim Patch Installer version 10.2.0.4.2
Copyright (c) 2007, Oracle Corporation. All rights reserved.

Usage: opatch [ -help ] [ -r[eport] ] [ command ]

command := apply
lsinventory
napply
nrollback
rollback
query
version
prereq
util

:= -help Displays the help message for the command.
-report Print the actions without executing.

example:
‘opatch -help’
‘opatch apply -help’
‘opatch lsinventory -help’
‘opatch napply -help’
‘opatch nrollback -help’
‘opatch rollback -help’
‘opatch prereq -help’
‘opatch util -help’

OPatch succeeded.

For applying any interim or one-off patch please find easy steps.

1) set ORACLE_HOME environment variable.

$ export ORACLE_HOME=/home/oracle10g

2) set JAVA_HOME environment variable.
OPatch requires JDK 1.4 or higher to work properly. JRE is installed using JDK.

$ export JAVA_HOME=/home/jdk/bin/java

3) set proper lsinventory using Opatch using following command.

$ OPatch lsinventory

4) Go to unzipped directory of patch using following command.

cd $ORACLE_HOME/OPatch

5) apply interim or one-off patch of Oracle.

$ /opatch apply /u01/patch/8708077

It will be applied your given one-off interim patch.

Log file of Opatch utility of Oracle:

OPatch maintains logs for all apply, rollback, and lsInventory operations. The log files are located in /cfgtoollogs/opatch directory. Each log file will be tagged with the timestamp of the operation. Log files are named as opatch__.log. Each time OPatch is executed a new log file is created.

Sample:
opatch_09-22-2009_20-05-00.log

How to rollback one-off interim patch whenever find problem:

$ opatch rollback /u01/patch/8708077

OR

$ OPatch/opatch rollback -id

For more detail and troubleshooting of opatch please refer oracle documentation or wait to publish another post.

Thanks and regards,
Rajiv Shah
http://www.dbametrix.com
http://www.dbametrix.com/service.html


Data Dictionary Objects for Tablespaces

Table spaces
dba_tablespaces
user_tablespaces

Tablespace Quotas
dba_ts_quotas
user_ts_quotas

Data Files
dba_data_files
v$backup_datafile
v$datafile
v$datafile_copy
v$datafile_header

Free Space
dba_free_space

Segments
dba_segments
v$segment_statistics

Extents
dba_extents

Blocks
v$database_block_corruption

Groups
dba_tablespace_groups

SYSAUX Tablespace
v_$sysaux_occupants

Temp Tablespace
dba_temp_files

Undo Tablespace
dba_rollback_segs
dba_undo_extents
v$rollstat
v$undostat

Transportable Tablespaces
transport_set_violations

Oracle Concepts - RDBMS Architecture


Oracle RDBMS Architecture

Oracle version 8i is an object-relational database management system (ORDBMS). Oracle8i (actually 8.1.5 production release) expands upon the new features offered in Oracle8 and makes over 150 changes or additions to the Oracle tools. A traditional RDBMS stores data in tables called relations. These relations are two-dimensional representations of data where the rows, called tuples in relational jargon, represent records, and the columns, called attributes, are the pieces of information contained in the record. Oracle8i provides new features in the object-oriented extensions provided in Oracle8 as well as to the Oracle RDBMS. In an object-relational database, columns can represent either a single value (as in standard relational databases), a varray (a fixed number of additional records), or a REF to a second table where a variable amount of data can be stored. This takes the two-dimensional relational view and adds a third dimension. In addition, in an object-relational database, procedures known as methods can be tied to the tables. Methods are above and beyond the old concept of triggers, as we shall see later. In latter releases of Oracle8i, JAVA a new object oriented language, can be used to create stored objects in an Oracle8i database.

Oracle consists of background processes, files, and executables. Lets look at these items.

Background Processes

Oracle is more than just a collection of programs that allow ease of data access. Oracle can be compared to an operating system that overlays the operating system of the computer on which it resides. Oracle has its own file structures, buffer structures, global areas, and tunability above and beyond those provided within the operating system. Oracle controls its own processes, controls its own records and consistencies, and cleans up after itself.

Oracle as it exists on your system (with the exception of DOS or OS/2) consists of executables, five to nine (or more) detached processes, a global memory area, data files, and maintenance files. It can be as small as a couple of megabytes, or as large as a massive globe-spanning construction of gigabytes. A diagram showing a typical Oracle8 and Oracle8i environment is shown in Figures 1 and 2; you may want to refer to these diagrams as you read the next sections.

Figure 1: Oracle 8 Structures

Figure 2: Oracle8i Structures

On VMS, NT (threads), or UNIX there may be a minimum of eight detached processes for Oracle7; for Oracle8i, this jumps to nearly a dozen. Four of these are the base Oracle processes and these processes are started every time Oracle is started up on a system; the additional processes may be started if the database is using archiving, uses TCPIP, or is being run in parallel and/or distributed mode. The Oracle job queues, snapshot processes, advanced queuing options, and callout processes all add to the process count. These processes are listed below.

* DBWR—Database Writer --This process handles data transfer from the buffers in the SGA to the database files.

* LGWR—Log Writer -- This process transfers data from the redo log buffers to the redo log database files.

* SMON—System Monitor -- This process performs instance recovery on instance startup and is responsible for cleaning up temporary segments. In a parallel environment, this process recovers failed nodes.

* PMON—Process Monitor -- This process recovers user processes that have failed and cleans up the cache. This process recovers the resources from a failed process.

* ARCH—Archiver Process -- This process is active only if archive logging is in effect. It writes the redo log data files that are filled into the archive log data files.

* RECO—Distributed Transaction -- This is an Oracle7 process that resolves failed distributed processes.

* LCKn—Lock Process -- This process is used for inter-instance locking in an Oracle7 parallel server environment.

* Dnnn—Dispatcher -- This process allows multiple processes to share a finite number of Oracle7 servers. It queues and routes process requests to the next available server.

* Snnn—Servers -- This Oracle7 process makes all the required calls to the database to resolve a user’s requests. It returns results to the Dnnn process that calls it.

* LISTENERTCPIP server -- If you are running TCPIP, this process, known as the listener process, will be running as well (only one per node).

* CKPxx -- This is the checkpoint process that can be started to optimize the checkpoint operation for Oracle logging.

* Snpxx -- These are snapshot process and job queues. Thee can be up to 32 configured in 8i.

* EXTPROC -- These are the callout queues; there will be one for each session performing callouts. It is hoped that Oracle will multithread these processes or it could result in the callout feature being unusable in a large multi-user environment.

* QMNn -- These are the Oracle queue monitor processes (new for 8i). They monitor the queues used in the Oracle advanced queuing (Oracle AQ). There can be up to 10 QMN processes. These take the place of the single AQ_TXX process in previous releases.

On multiuser-capable systems, each user process may spawn several sub-processes depending on the type of activities being done by that process. Depending on how Oracle is configured, a single parallel query may start dozens of query slave processes for a single user!

Datafiles

In Oracle datafiles are the physical implementation of the logical concept of tablespaces. Each tablespace contains segments which can be one of a specific set of segment types:

* Data (both normal and partitioned)

* Index (both normal and partitioned)

* Rollback

* Temporary

Each segment is made up of extents and each extent is made from the finest level of granularity in the database, blocks.

Each datafile is allowed to sized either to 2, 4 or more gigabytes in size depending on operating system and patch level of Oracle.

Datafile placement has grown fuzzy in the last several years with the addition of RAID to the system administrators toolkit. It used to be before the wide spread use of RAID that a single disk platter could be assigned to handle a specific type of segment (and hence their datafiles). Now with striping, plaiding and other esoteric disk array arrangements it becomes harder and harder to determine what segment type is located on which disk.

As a DBA it will be your responsibility to:

1. Ensure datafiles are properly sized

2. Ensure, to the best of your ability, segment types are separated to ensure contention is realized

3. Ensure tablespaces are maintained to prevent fragmentation and poor space utilization

4. Ensure datafiles are properly backed up to allow for proper recovery in case of failure.

How to Install and Configure Oracle on Linux

How to Install and Configure Oracle on Linux

======================================
A step-by-step demonstration of the Oracle installation process.
Oracle RDBMS is a full-featured relational database management system from Oracle Corporation. It includes a set of administration tools, and precompilers for most programming languages. This article will cover how to install and configure an Oracle database on Linux.
The installation file for Oracle 8.0.5 Enterprise Edition is named Oracle8051EE_Intel.tgz. It can be downloaded from ftp://technet.oracle.com/. If needed, the glibc patch file glibcpatch.tgz can be downloaded from ftp://ftp.oracle.com/pub/www/otn/linux/.
Oracle currently uses glibc 2.0 rather than glibc 2.1. Oracle has supplied a patch which, when combined with compatibility RPM packages, allows it to run on Red Hat 6.0. I chose to use the Linux-Mandrake 6.0 distribution for this installation. If you are not using 6.0, you can skip the steps for installing the compatibility RPMs and the glibc patch. It is possible to install Oracle on other distributions, but since Oracle uses Red Hat for its development, Red Hat (or some variation of Red Hat) is preferred.
The C Development package must be installed when you install Linux. If you want to install Oracle's Intelligent agent, you must have tcl-8.0.3-20.i386.rpm installed. To install the JDBC drivers, you must define a path to your classesxxx.zip file.
I recommend creating a minimum of three partitions for Oracle. This allows you to use Oracle's Optimum Flexible Architecture (OFA) standard. Using OFA gives you the capability to segregate data from indexes and have multiple control files. The partitions should be named u01, u02 and u03. You can create more partitions if you have the disks to support them. I have two disks on my machine, so I created a partition of 1GB for /u01 and 150MB for /u02. I then created a directory called /u03 to give me the equivalent of another mount point. The first partition (/u01) is where the Oracle executables and all associated files will be placed during the installation process. The remaining mount points will be used for data files, indexes and control files.
A multitude of directories are created during the installation process. Some of the more important ones are:
  • $ORACLE_HOME/bin contains the executables for the database and administrative software.
  • $ORACLE_HOME/rdbms/admin contains the SQL scripts used to create the catalog, and other useful scripts too numerous to cover here. Refer to the Oracle Database Administration Manual for an explanation of the scripts contained in this directory.
  • $ORACLE_BASE/admin/SID/bdump contains the alert log for the instance. The name of the alert log is alert_SID.log, where SID is the system identifier for the instance (i.e., alert_greg.log for this installation). This file is extremely important in determining where problems lie. Any time you have an error or database crash, this is the first place to look for information on what might have happened to cause the problem.
  • $ORACLE_HOME/network/admin contains the tnsnames.ora and listener.ora files. Both of these files are described in the section on modifying configuration files.
  • $ORACLE_HOME/precomp/demo/proc contains several Pro*C example programs.
The data files, indexes and control files will be placed in /oradata/SID, where SID is the system identifier for the instance (i.e., /u01/oradata/greg, /u02/oradata/greg and /u03/oradata/greg for this installation).
The installation is broken down into 8 steps:
  • Pre-installation sets up the groups and users, and performs all the tasks prior to actually installing the software.
  • Software installation is the process of installing the software.
  • Documentation installation is the process of installing the on-line documentation for Oracle. This must be done in a separate step due to a bug in the installation process.
  • Binary patching is the process of applying the glibc patch supplied by Oracle.
  • Database creation creates the initial database.
  • Post-installation is the process of running a post-install script as root.
  • Configuration file modification is the process of identifying and modifying the configuration files used by the database and Net8.
  • Testing and automation is the final process of determining that the database is installed and configured properly, and setting the instance up to start automatically when the machine is rebooted.
Pre-installation Steps
Download the compatibility RPMs from Red Hat. The necessary RPMs are compat-binutils-5_2-2_9_1_0_23_1_i386.rpm, compat-glibc-5_2-2_0_7_1_i386.rpm, compat-egcs-5_2-1_0_3a_1_i386.rpm, compat-egcs-c++-5_2-1_0_3a_1_i386.rpm and compat-libs-5_2-1_i386.rpm. Issue the following commands to install the RPMs:
rpm -ivh compat-binutils-5_2-2_9_1_0_23_1_i386.rpm
rpm -ivh compat-glibc-5_2-2_0_7_1_i386.rpm
rpm -ivh compat-egcs-5_2-1_0_3a_1_i386.rpm
rpm -ivh compat-egcs-c++-5_2-1_0_3a_1_i386.rpm
rpm -ivh compat-libs-5_2-1_i386.rpm
Edit /etc/passwd for root and change the shell from /bin/bash to /bin/sh. This will make the installation scripts supplied by Oracle run without errors.
Create the groups and users used by Oracle. At a minimum, you will need a group called dba for the oracle user. You may also want to create a group called oper for the operation of the database. Refer to the Database Administrator's Guide for Oracle to determine whether you want to create this group. In the following example, I used only the dba group, with a group ID of 601. You may need to use a different group ID if 601 is already in use on your system. Be sure to change the password for the oracle user.
groupadd -g 601 dba
useradd oracle -g 601
passwd oracle
Edit /etc/passwd as root to change the default shell.
Create the directories for your mount points if you didn't create them as partitions. Repeat the commands for all three mount points if necessary.
mkdir /u01
chown -R oracle.dba /u01
Change to the directory where you have unpacked the Oracle8051EE_Intel.tgz file (this is your staging directory for the installation process), and run the script to create the /etc/oratab file. This file is used by Oracle's startup script to determine which instances are running on the machine, and whether they should autostart when the machine is rebooted. More on this file later.
cd /home/oracle/orainst/orainst
ORACLE_OWNER=oracle; export ORACLE_OWNER
sh oratab.sh
See Figure 1 for prompts and their replies.
Log out as root and log in as oracle. Make sure umask is set to 022 by typing umask. If it is not set to 022, you will need to add a line to your .profile file. Set the following environment variables in oracle's .profile:
ORACLE_BASE=/u01/app/oracle
ORACLE_HOME=/u01/app/oracle/product/8.0.5
ORACLE_SID=greg #(replace with your system
               #identifier)
ORACLE_TERM=386
PATH=$PATH:/u01/app/oracle/product/8.0.5/bin
TMPDIR=/var/tmp
export ORACLE_BASE ORACLE_HOME ORACLE_SID\
 ORACLE_TERM
export PATH TMPDIR
umask 022 #(only if the umask is not already
         #set to 022)
Log out, then log back in as oracle. Make sure the environment variables are set by using the env command, and that /bin:/usr/bin:/usr/local/bin is in your path.
Software Install Process
Change to your staging directory and start the Oracle installer.
cd /home/oracle/orainst/orainst
./orainst /c
Select the custom install (see Figure 2). Read the preamble.txt file and press return to continue. Read the README.FIRST file and press return to continue. Select Install, Upgrade or De-install Software (see Figure 3). Select Install New Product—Do Not Create DB Objects (see Figure 4). Make sure the ORACLE_BASE and ORACLE_HOME environment variables are set correctly (see Figure 5). Press return to accept the defaults for your log files. It's a good idea to make a note of their locations, too. If anything goes wrong during the installation process, you may need to look at them. It is also a good idea to look at them even if everything works fine in order to learn more about the installation process (see Figure 6). Select Install from Staging Area (see Figure 7); make sure the staging area is set correctly. In my example, I used /home/oracle/orainst (see Figure 8). Select your language (see Figure 9). Press return to acknowledge the location of the root.sh post-install script. The default location is /u01/app/oracle/product/8.0.5/orainst/root.sh. Select the following products to install (see Figure 10):
  • Client Software
  • Net8
  • TCP/IP Protocol Adapter
  • Object Type Translator
  • Oracle ConText Cartridge
  • Oracle8 Objects Option
  • Oracle8 Partitioning Option
  • Oracle Unix Installer
  • Oracle8 Enterprise (RDBMS)
  • PL/SQL
  • Pro*C/C++ (precompiler for C and C++)
  • SQL*Plus
Use the space bar to select/deselect the products. Do not install the documentation. We will do that in a later step. After selecting all the products you want to install, tab to the Install prompt and press return. You will receive a warning about ULIMIT not being set. You can ignore this by pressing return (see Figure 11). Select dba as your DBA group (see Figure 12). If you decided to create a separate group for operation of the database, enter it for the OSOPER group (refer to snapshot Figure 13). For this install, I used the dba group as the OSOPER group.
Figure 14
At this point, the installer will begin copying the software. This is a good time to take a break, since this could take a while—how long will depend on the speed of your machine.
When the software installation process is complete, you should get a message that says “The requested action has been performed for selected products.” (See Figure 15) Press return to acknowledge the message, tab to Exit, then press return. tab to indicate Yes on the Confirmation and press return to exit the installer. The installer should exit with the message “Result: Success”.
Documentation Installation
Make the directory where the on-line documentation will be installed (mkdir /u01/app/oracle/doc). Link the directory to correct a bug in the install process:
ln -s /u01/app/oracle/doc /u01/app/oracle/product/8.0.5
Start the installer from your staging directory (./orainst /c). Select custom install. Click on OK to bypass the README files. Select Install, Upgrade or De-install software. Select Add/Upgrade Software. Press enter to acknowledge the environment variable setting for ORACLE_HOME. Press enter to acknowledge the location of the log files. Select Install from Staging Area. Press enter to acknowledge the path of the staging area. Select the appropriate language. Select Append to append to the root.sh script created during the software installation process. This is done because we haven't run the script yet, and we don't want to overlay the script created in the previous step. Press return at the Information screen, which gives the location for the root.sh script. Select the Intel LINUX Documentation and tab to install. Press return to begin the installation process. Press return to acknowledge the location of the on-line documentation (see Figure 16). Select the format (HTML or PDF) you want for the on-line documentation (see Figure 17). Once again, we're looking for the message, “The requested action has been performed for selected products.” Press return to acknowledge the message, tab to Exit, then press return. Select Yes from the Confirmation screen to exit the installer. Again, we hope to see the installer exit with a message of “Result: Success”.
Binary Patching
Change to the directory where you downloaded the glibc patch file, glibcpatch.tgz. Unpack the file, tar -xvzf glibcpatch.tgz. Run the patch script glibcpatch.sh, sh glibcpatch.sh. The final screen should look something like Figure 18.
Create the Database
Now it is time to create the original database.
  • Change to your staging directory (cd /home/oracle/orainst/orainst).
  • Start the installer (./orainst /c).
  • Select Custom Install.
  • Press enter twice to bypass the README files.
  • Select Create/Upgrade Database objects.
  • Select Create Database Objects.
  • Press return to acknowledge the environment variables ORACLE_HOME and ORACLE_BASE.
  • Press return to acknowledge the locations for the log files.
  • Press return to acknowledge the environment variable ORACLE_SID.
  • Select Oracle8 Enterprise (RDBMS), tab to INSTALL and press return.
  • Select Create Product DB Objects (see Figure 19).
  • Select Filesystem-based Database (see Figure 20).
  • Select Yes to distribute control files over three mount points (see Figure 21).
  • Enter the three mount points of /u01, /u02 and /u03 (see Figure 22).
  • Select the appropriate character set.
  • Select the appropriate national character set.
  • Enter the password you want to use for the SYSTEM account. You will be asked to enter it a second time to confirm the password.
  • Enter the password you want to use for the SYS account. You will be asked to confirm that too.
  • If you want an internal password for dba and operator, tab to Yes at this prompt. If you don't want an internal password tab to No.
  • Enter and confirm the password you want to use for the TNS listener.
  • Click on No to configure the MTS Listener (see Figure 23).
  • Press return to acknowledge the defaults for the location of the control files.
  • Press return twice if you wish to accept the defaults for the paths to your data files and their sizes. If you have not done any database sizing and thereby determined you need more space, the default sizes should be appropriate (see Figure 24). You can add space to any data file at a later time, if necessary.
  • Select Yes to accept the default file names and sizes (see Figure 25).
The installer will now create the initial database. As with the software installation, this is another good time to take a break. As before, we hope to see “The requested action has been performed for selected products.” message. Press return to return to the main install screen; tab to Exit, then press return; select Yes at the confirmation screen.
Post-Installation
Log out, then log back in again as root. Copy the oracle user's .profile to root's home directory (cp ~oracle/.profile /root/.profile). Log out, then back in as root. Check that the environment variables in the .profile are set properly by issuing an env command.
Change to the /orainst directory and run the root.sh script.
cd $ORACLE_HOME/orainst
sh root.sh
Verify ORACLE_OWNER, ORACLE_HOME and ORACLE_SID are correct. If they are, enter Y.
When it asks for the full path name to your local bin directory, enter /usr/local/bin. The script then tells you ORACLE_HOME does not match the home directory for oracle. This is not a problem. Type a Y and continue. The script will complete. (See Figure 26)
Log on as oracle and shut down the instance (see Figure 27).
svrmgrl
connect internal
shutdown
exit

Configuration File Modification
Now for some cleanup and file modifications. The initSID.ora, where SID is the system identifier for the instance, file is located in the $ORACLE_HOME/dbs directory. This file is read by Oracle when the instance is started. It is used to set parameters for the instance, such as the amount of memory reserved for the database. There are too many parameters to go over in this article. Refer to the Oracle database administrator's guide for an explanation of the parameters and their recommended settings. You will probably be fine with the default values. However, if you have a large amount of memory on your machine, you may want to uncomment either the medium or large settings of the parameters in the initSID.ora file.
The oratab file is located in the /etc directory. This file is read by the dbstart file which we will use to automatically start the instance when the machine is rebooted. There are comments in the oratab file which explain the three fields and what they contain. Change the last field to Y for instances in which you want to start when the machine is rebooted. The file should look something like Listing 1.
Listing 1.
The listener.ora file is located in the $ORACLE_HOME/network/admin directory. This file is used by Net8 to determine how network connections are made to the instance(s) on your machine. Update the listener.ora file with the sid to which the Net8 listener should listen. Replace oracle_sid with the sid name. The file should look something like Listing 2.
Listing 2.
The tnsnames file is located in the $ORACLE_HOME/network/admin directory. This file is used by Net8 to determine the location for remote databases you can connect to. Replace oracle_sid with the sid name. The file should look something like Listing 3.
Listing 3.
As root, issue the following commands to set the permissions correctly for the Net8 files:
chown oracle.dba $ORACLE_HOME/bin/tnslsnr chmod 750 $ORACLE_HOME/bin/tnslsnr chown oracle.dba $ORACLE_HOME/network/log chmod 775 $ORACLE_HOME/network/log chown root.dba \ $ORACLE_HOME/network/log/listener.log chmod 664 $ORACLE_HOME/network/log/listener.log
If you receive an error because the listener.log doesn't exist, you will need to enter the last two commands after you stop and start the listener.
Testing
Start the instance:
svrmgrl
connect internal
startup
exit
Connect to the database using SQL*Plus:
sqlplus
system
system_password
select count(*) from dba_objects; #(This should
# return a count of the number of objects in the
# database)
exit
Start the TNS listener:
lsnrctl start
You should see something like Figure 28.
Connect to the database using SQL*Plus through a network connection. This can be done using only one machine if you don't really have a network installed.
sqlplus system/system@greg
greg refers to the entry in the $ORACLE_HOME/network/admin/tnsnames.ora file
select count(*) from dba_objects;
exit
Automation
Create the following symbolic links to automatically start and shut down the listener and Oracle instances:
ln -s/etc/rc.d/init.d/dbora /etc/rc.d/rc0.d/K10dbora
ln -s/etc/rc.d/init.d/dbora /etc/rc.d/rc2.d/S99dbora
ln -s/etc/rc.d/init.d/dbora /etc/rc.d/rc3.d/S99dbora
ln -s/etc/rc.d/init.d/dbora /etc/rc.d/rc5.d/S99dbora

ln -s/etc/rc.d/init.d/dbora /etc/rc.d/rc6.d/K10dbora
Listing 4.
Listing 5.
Listing 6.
Place the file dbora (Listing 4) in /etc/rc.d/init.d. Place the file lsnrstart (Listing 5) in the $ORACLE_HOME/bin directory. Place the file lsnrstop (Listing 6) in the $ORACLE_HOME/bin directory.
The listener and all Oracle instances designated to automatically start in the /etc/oratab file should shut down and restart when the machine is rebooted.
At this point, the database has been created. You can use SQL*Plus to create tables. If you are unfamiliar with SQL, there are a number of good books available on the subject.
Oracle8i Install Differences
The install process for the latest release of Oracle for Linux (8.1.5 or Oracle8i) is slightly different. The installer has been rewritten in Java so the look and feel along with some of the responses are different. This section will cover the differences in the new install process.
You still need to create your dba group, oracle user, directories and mount points.
Download and install JRE (or JDK) 1.1.6 v5 from http://www.blackdown.org/. Create a symbolic link for the directory in which you installed JRE.
ln -s jre_install_location /usr/local/jre
Mount the CD-ROM which contains the Oracle8i software:
mount -t iso9660 /dev/cdrom /mnt/cdrom Log on as oracle and change directories to the CD-ROM and start the installer: cd /mnt/cdrom ./runInstaller
You should see a welcome screen like Figure 29. Click “Next”. You will be prompted for the location of the installation jar file and your Oracle home directory. Make any necessary changes and click “Next” (Figure 30). Enter the dba group you created in the previous step (Figure 31) and click “Next”. You will be prompted to run /tmp/OraInstall/orainstRoot.sh (Figure 32). After you run it, you should see the following lines of output:
Creating Oracle Inventory pointer file (/etc/oraInst.loc) Changing group name of /u01/app/oracle/product/oraInventory to dba. Return to the pop-up window and click Retry.
Figure 43
You will be prompted to install the Oracle8i Enterprise Server, Oracle8i Client or Oracle Programmer. Select the “Enterprise Serveri” (Figure 47) and click “Next”. You will be prompted for the type of install. Select “Custom” (Figure 33) and click “Next”. You will be prompted for which products you want to install (Figures 34, 35, 36). After you have selected the products to install, click “Next”. You can change the locations the products will be installed in or click “Next” to take the defaults (Figure 37). You will be prompted to create the database using the Oracle Database Configuration Assistant (DBCA). Select “Yes” and click “Next” (Figure 38). You will be prompted for the Global Database Name and the SID. Modify the screen capture to reflect your names (Figure 39). You will be prompted for the location of your database files. In my example, I used the mount point /u01 (Figure 40). You will prompted to select which network protocol(s) to install based on which protocols are present on your machine (Figure 41) click “Next”. You will see a summary of your install options. This will allow you to use the “Previous” button to change any settings that are incorrect (Figure 42). When you are ready to begin the install process click “Install”. The install screen will list where the log file from the install is being written (Figure 44). This information will come in handy if something goes wrong during the installation. When the install is complete, you will see a pop-up window (Figure 45). Note the location of the script to run as root, change to the directory where the root.sh script is located and run it. You may have to change the permissions on it to make it executable.
cd /u01/app/oracle/product/8.1.5 export ORACLE_OWNER=oracle export ORACLE_SID=greg chmod 700 root.sh ./root.sh
After the root.sh script successfully executes (expected output in Figure 46) return to the pop-up message and click “OK”. At this point the installation is complete, and you can click “Next”, then “Exit”. The testing and automation procedures are the same as in the previous section for Oracle 8.0.5.
All listings referred to in this article are available by anonymous download in the file ftp.ssc.com/pub/lj/listings/issue67/3572.tgz

Friday, May 7, 2010

What is the Difference between LINUX and Solaries

Both Linux and Solaris are flavours of UNIX. Solaries is the form of unix customized by Sun Microsystems. It is now acquired by Oracle Corporation. Linux is an open source. It is now being customized by many different companies like Oacle Corporation,Red Hat, SuSe, Debian etc. Some unix commands are common to both linux and solaris whereas some commands differ.

Linux is a freeware and some vendors like fedora core offer linux whichcan be downloaded and installed for free. Solaris is licenced version from sun microsystems (can be fixed or floating licence). Both are operating systems upon which all the applications run. Sun has its own form of hardware called as sun servers which are used to host solaris. Check the documentation of the vendor before installing linux to confirm the compatability of linux in the particular hardware. There are many open source forms and groups that helps us information on linux. For more details on Solaris and linux visit this site. It has useful articles. : http://neworacledba.blogspot.com

RAC FAQS

Oracle RAC(Real Application Cluster) DBA Interview Questions

Q) What is RAC?

RAC stands for Real Application cluster. It is a clustering solution from Oracle Corporation that ensures high availability of databases by providing instance failover, media failover features.
Mention the Oracle RAC software components:-
Oracle RAC is composed of two or more database instances. They are composed of Memory structures and background processes same as the single instance database.Oracle RAC instances use two processes GES(Global Enqueue Service), GCS(Global Cache Service) that enable cache fusion.Oracle RAC instances are composed of following background processes:
ACMS—Atomic Controlfile to Memory Service (ACMS)
GTX0-j—Global Transaction Process
LMON—Global Enqueue Service Monitor
LMD—Global Enqueue Service Daemon
LMS—Global Cache Service Process
LCK0—Instance Enqueue Process
RMSn—Oracle RAC Management Processes (RMSn)
RSMN—Remote Slave Monitor

Q) AbsGRD stands for Global Resource Directory. The GES and GCS maintains records of the statuses of each datafile and each cahed block using global resource directory.This process is referred to as cache fusion and helps in data integrity.

Give Details on Cache Fusion:-

Oracle RAC is composed of two or more instances. When a block of data is read from datafile by an instance within the cluster and another instance is in need of the same block,it is easy to get the block image from the insatnce which has the block in its SGA rather than reading from the disk. To enable inter instance communication Oracle RAC makes use of interconnects. The Global Enqueue Service(GES) monitors and Instance enqueue process manages the cahce fusion.

Give Details on ACMS:-
ACMS stands for Atomic Controlfile Memory Service.In an Oracle RAC environment ACMS is an agent that ensures a distributed SGA memory update(ie)SGA updates are globally committed on success or globally aborted in event of a failure.

Give details on GTX0-j :-
The process provides transparent support for XA global transactions in a RAC environment.The database autotunes the number of these processes based on the workload of XA global transactions.

Give details on LMON:-
This process monitors global enques and resources across the cluster and performs global enqueue recovery operations.This is called as Global Enqueue Service Monitor.

Give details on LMD:-
This process is called as global enqueue service daemon. This process manages incoming remote resource requests within each instance.

Give details on LMS:-
This process is called as Global Cache service process.This process maintains statuses of datafiles and each cahed block by recording information in a Global Resource Dectory(GRD).This process also controls the flow of messages to remote instances and manages global data block access and transmits block images between the buffer caches of different instances.This processing is a part of cache fusion feature.

Give details on LCK0:-
This process is called as Instance enqueue process.This process manages non-cache fusion resource requests such as libry and row cache requests.

Give details on RMSn:-
This process is called as Oracle RAC management process.These pocesses perform managability tasks for Oracle RAC.Tasks include creation of resources related Oracle RAC when new instances are added to the cluster.

Give details on RSMN:-
This process is called as Remote Slave Monitor.This process manages background slave process creation andd communication on remote instances. This is a background slave process.This process performs tasks on behalf of a co-ordinating process running in another instance.

Q)What components in RAC must reside in shared storage?
All datafiles, controlfiles, SPFIles, redo log files must reside on cluster-aware shred storage.

Q)What is the significance of using cluster-aware shared storage in an Oracle RAC environment?
All instances of an Oracle RAC can access all the datafiles,control files, SPFILE's, redolog files when these files are hosted out of cluster-aware shared storage which are group of shared disks.
Give few examples for solutions that support cluster storage:-
ASM(automatic storage management),raw disk devices,network file system(NFS), OCFS2 and OCFS(Oracle Cluster Fie systems).

Q)What is an interconnect network?
an interconnect network is a private network that connects all of the servers in a cluster. The interconnect network uses a switch/multiple switches that only the nodes in the cluster can access.

Q)How can we configure the cluster interconnect?
Configure User Datagram Protocol(UDP) on Gigabit ethernet for cluster interconnect.On unia and linux systems we use UDP and RDS(Reliable data socket) protocols to be used by Oracle Clusterware.Windows clusters use the TCP protocol.

Q)Can we use crossover cables with Oracle Clusterware interconnects?
No, crossover cables are not supported with Oracle Clusterware intercnects.

Q)What is the use of cluster interconnect?
Cluster interconnect is used by the Cache fusion for inter instance communication.

Q)How do users connect to database in an Oracle RAC environment?
Users can access a RAC database using a client/server configuration or through one or more middle tiers ,with or without connection pooling.Users can use oracle services feature to connect to database.

Q)What is the use of a service in Oracle RAC environemnt?
Applications should use the services feature to connect to the Oracle database.Services enable us to define rules and characteristics to control how users and applications connect to database instances.

Q)What are the characteriscs controlled by Oracle services feature?
The charateristics include a unique name, workload balancing and failover options,and high availability characteristics.

Q)Which enable the load balancing of applications in RAC?
Oracle Net Services enable the load balancing of application connections across all of the instances in an Oracle RAC database.

Q)What is a virtual IP address or VIP?
A virtl IP address or VIP is an alternate IP address that the client connectins use instead of the standard public IP address. To configureVIP address, we need to reserve a spare IP address for each node, and the IP addresses must use the same subnet as the public network.

Q)What is the use of VIP?
If a node fails, then the node's VIP address fails over to another node on which the VIP address can accept TCP connections but it cannot accept Oracle connections.

Give situations under which VIP address failover happens:-
VIP addresses failover happens when the node on which the VIP address runs fails, all interfaces for the VIP address fails, all interfaces for the VIP address are disconnected from the network.

Q)What is the significance of VIP address failover?
When a VIP address failover happens, Clients that attempt to connect to the VIP address receive a rapid connection refused error .They don't have to wait for TCP connection timeout messages.

Q)What are the administrative tools used for Oracle RAC environments?
Oracle RAC cluster can be administered as a single image using OEM(Enterprise Manager),SQL*PLUS,Servercontrol(SRVCTL),clusterverificationutility(cvu),DBCA,NETCA

Q)How do we verify that RAC instances are running?
Issue the following query from any one node connecting through SQL*PLUS.
$connect sys/sys as sysdba
SQL>select * from V$ACTIVE_INSTANCES;
The query gives the instance number under INST_NUMBER column,host_:instancename under INST_NAME column.

Q)What is FAN?
Fast application Notification as it abbreviates to FAN relates to the events related to instances,services and nodes.This is a notification mechanism that Oracle RAc uses to notify other processes about the configuration and service level information that includes service status changes such as,UP or DOWN events.Applications can respond to FAN events and take immediate action.

Q)Where can we apply FAN UP and DOWN events?
FAN UP and FAN DOWN events can be applied to instances,services and nodes.

Q)State the use of FAN events in case of a cluster configuration change?
During times of cluster configuration changes,Oracle RAC high availability framework publishes a FAN event immediately when a state change occurs in the cluster.So applications can receive FAN events and react immediately.This prevents applications from polling database and detecting a problem after such a state change.

Q)Why should we have seperate homes for ASm instance?
It is a good practice to have ASM home seperate from the database hom(ORACLE_HOME).This helps in upgrading and patching ASM and the Oracle database software independent of each other.Also,we can deinstall the Oracle database software independent of the ASM instance.

Q)What is the advantage of using ASM?
Having ASM is the Oracle recommended storage option for RAC databases as the ASM maximizes performance by managing the storage configuration across the disks.ASM does this by distributing the database file across all of the available storage within our cluster database environment.

Q)What is rolling upgrade?
It is a new ASM feature from Database 11g.ASM instances in Oracle database 11g release(from 11.1) can be upgraded or patched using rolling upgrade feature. This enables us to patch or upgrade ASM nodes in a clustered environment without affecting database availability.During a rolling upgrade we can maintain a functional cluster while one or more of the nodes in the cluster are running in different software versions.

Q)Can rolling upgrade be used to upgrade from 10g to 11g database?
No,it can be used only for Oracle database 11g releases(from 11.1).
State the initialization parameters that must have same value for every instance in an Oracle RAC database:-
Some initialization parameters are critical at the database creation time and must have same values.Their value must be specified in SPFILE or PFILE for every instance.The list of parameters that must be identical on every instance are given below:
ACTIVE_INSTANCE_COUNT
ARCHIVE_LAG_TARGET
COMPATIBLE
CLUSTER_DATABASE
CLUSTER_DATABASE_INSTANCE
CONTROL_FILES
DB_BLOCK_SIZE
DB_DOMAIN
DB_FILES
DB_NAME
DB_RECOVERY_FILE_DEST
DB_RECOVERY_FILE_DEST_SIZE
DB_UNIQUE_NAME
INSTANCE_TYPE (RDBMS or ASM)
PARALLEL_MAX_SERVERS
REMOTE_LOGIN_PASSWORD_FILE
UNDO_MANAGEMENT

Q)Can the DML_LOCKS and RESULT_CACHE_MAX_SIZE be identical on all instances?
These parameters can be identical on all instances only if these parameter values are set to zero.
What two parameters must be set at the time of starting up an ASM instance in a RAC environment?The parameters CLUSTER_DATABASE and INSTANCE_TYPE must be set.
Mention the components of Oracle clusterware:-

Q)Oracle clusterware is made up of components like voting disk and Oracle Cluster Registry(OCR). What is a CRS resource?
Oracle clusterware is used to manage high-availability operations in a cluster.Anything that Oracle Clusterware manages is known as a CRS resource.Some examples of CRS resources are database,an instance,a service,a listener,a VIP address,an application process etc.

Q)What is the use of OCR?
Oracle clusterware manages CRS resources based on the configuration information of CRS resources stored in OCR(Oracle Cluster Registry).

Q)How does a Oracle Clusterware manage CRS resources?
Oracle clusterware manages CRS resources based on the configuration information of CRS resources stored in OCR(Oracle Cluster Registry).

Q)Name some Oracle clusterware tools and their uses?
OIFCFG - allocating and deallocating network interfaces
OCRCONFIG - Command-line tool for managing Oracle Cluster Registry
OCRDUMP - Identify the interconnect being used
CVU - Cluster verification utility to get status of CRS resources

Q)What are the modes of deleting instances from ORacle Real Application cluster Databases?
We can delete instances using silent mode or interactive mode using DBCA(Database Configuration Assistant).

Q)How do we remove ASM from a Oracle RAC environment?
We need to stop and delete the instance in the node first in interactive or silent mode.After that asm can be removed using srvctl tool as follows:
srvctl stop asm -n node_name
srvctl remove asm -n node_name
We can verify if ASM has been removed by issuing the following command:
srvctl config asm -n node_name

Q)How do we verify that an instance has been removed from OCR after deleting an instance?
Issue the following srvctl command:
srvctl config database -d database_name
cd CRS_HOME/bin
./crs_stat

Q)How do we verify an existing current backup of OCR?
We can verify the current backup of OCR using the following command : ocrconfig -showbackup

Q)What are the performance views in an Oracle RAC environment?
We have v$ views that are instance specific. In addition we have GV$ views called as global views that has an INST_ID column of numeric data type.GV$ views obtain information from individual V$ views.

Q)What are the types of connection load-balancing?
There are two types of connection load-balancing:server-side load balancing and client-side load balancing.

Q)What is the differnece between server-side and client-side connection load balancing?
Client-side balancing happens at client side where load balancing is done using listener.In case of server-side load balancing listener uses a load-balancing advisory to redirect connections to the instance providing best service.
Give the usage of srvctl:-
srvctl start instance -d db_name -i "inst_name_list" [-o start_options]srvctl stop instance -d name -i "inst_name_list" [-o stop_options]srvctl stop instance -d orcl -i "orcl3,orcl4" -o immediatesrvctl start database -d name [-o start_options]srvctl stop database -d name [-o stop_options]srvctl start database -d orcl -o mount

Oracle RAC(Real Application Cluster) Tool Ocrcheck,OCRCHECK Utility

An ocrcheck utility is a diagnostic tool used for diagnosing OCR( Oracle Cluster Registry) Problems.This is used to verify the Oracle Cluster Registry(OCR) integrity

OCR - Oracle Cluster Registry is a component of RAC whose loss is crucial. So it is mandatory to check the health status. For this purpose we use ocrcheck utility.

Q)What does an ocrcheck display?
The OCRCHECK utility displays the version of the OCR’s block format, total space available and used space, OCRID, and the OCR locations that we have configured.
How does ocrcheck perform integrity check?
OCRCHECK performs a block-by-block checksum operation for all of the blocks in all of the OCRs that we have configured. It also returns an individual status for each file as well as a result for the overall OCR integrity check.
Give a sample output of ocrcheck utility:-
Sample of the OCRCHECK utility output:
Status of Oracle Cluster Registry is as follows :
Version : 2
Total space (kbytes) : 262144
Used space (kbytes) : 16256
Available space (kbytes) : 245888
ID : 1918913332
Device/File Name : /dev/raw/raw1
Device/File integrity check succeeded
Device/File Name : /dev/raw/raw2
Device/File integrity check succeeded
Cluster registry integrity check succeeded
Where does an ocrcheck utility create a log file?
OCRCHECK creates a log file in the directory CRS_home/log/hostname/client.
How can we change the amount of logging?
To change amount of logging, edit the file CRS_home/srvm/admin/ocrlog.ini

Search This Blog